Resource Guide
Ultimate Guide to EMI Testing: Tips & Technique Explained


Introduction
Even the best-designed circuit can fail if electromagnetic interference (EMI) isn’t managed. Missed compliance, unexpected malfunctions, and launch delays are costly setbacks engineers can’t afford. The challenge is balancing strict standards, tight schedules, and budgets while ensuring products perform reliably.
EMI testing provides that assurance. Done right, it prevents redesigns, validates design confidence with trusted data, protects customer satisfaction, and secures compliance with international standards that open global markets.
Far from being a box to check, EMI testing is an investment in product reliability and long-term success.
This guide walks you through the fundamentals of EMI testing with clear steps, practical tips, and troubleshooting techniques. You’ll learn how to prepare for standards like CISPR and IEC 61000, select the right test equipment, and apply strategies that save time and cost. Start with the basics of EMI Testing for Electrical Engineers, then use this article as your reference for applying those concepts in practice.
Background and Context
Electromagnetic Interference (EMI) refers to unwanted disturbances that disrupt the normal operation of electronic devices. Electromagnetic Compatibility (EMC) is the ability of equipment to function correctly in its electromagnetic environment without causing or experiencing interference.
EMI is typically measured in two forms: emissions, which are the signals your device unintentionally radiates or conducts, and immunity, which describes how well your device withstands external disturbances.
EMI testing is critical because it directly impacts product performance, user safety, and market approval. A product that fails EMI standards can malfunction in real-world environments, compromise reliability, or even become unsafe. From a business perspective, non-compliance can mean redesign costs, delays, or losing access to key global markets.
Common misconceptions about EMI and testing include:
- EMI only affects sensitive or high-frequency devices.
- Passing one test standard guarantees compliance everywhere.
- Troubleshooting EMI issues is only necessary late in development.
- Pre-compliance testing adds unnecessary cost instead of reducing it.
To get the most from this guide, you’ll need a working knowledge of basic circuit design, familiarity with test equipment like spectrum analyzers and EMI receivers, and awareness of best practices for PCB layout and grounding.
The importance of EMI testing is clear: industry studies show that up to 50% of products fail initial EMI compliance testing, leading to costly redesigns and time-to-market delays. Investing in structured EMI testing from the start reduces these risks and helps ensure long-term reliability.
For a deeper foundation, explore Fundamentals of EMI and EMC Testing, which explains how EMI relates to EMC and why compatibility matters across industries.
Step-by-Step Instructions for EMI Testing
Successful EMI testing follows a clear workflow, starting with careful preparation and ending with accurate documentation. Each step builds on the last to ensure reliable, repeatable results and smooth compliance reporting.
EMI Testing Workflow at a Glance
| Test phase | Difficulty level | Approx. time required |
|---|---|---|
| Planning and preparation | Intermediate | 2–4 hours |
| Setting up test equipment | Intermediate | 1–2 hours |
| Conducted emissions testing | Advanced | 3–6 hours |
| Radiated emissions testing | Advanced | 4–8 hours |
| Immunity testing | Advanced | 4–10 hours |
| Root cause analysis & troubleshooting | Advanced | Varies (2–12 hours) |
| Documentation and reporting | Basic | 2–4 hours |
Step 1: Test Planning and Preparation
Define applicable standards (CISPR, MIL-STD, IEC 61000), classify your device, and secure a proper test environment such as a shielded room or anechoic chamber.
Checklist:
- Identify target markets and regulatory standards
- Classify device type and operating conditions
- Reserve compliant test facilities
Tip: Early planning avoids costly last-minute redesigns.
Expected outcome: A clear test plan aligned with compliance requirements.
Take-away: The more precise your planning, the fewer surprises you’ll face during testing.
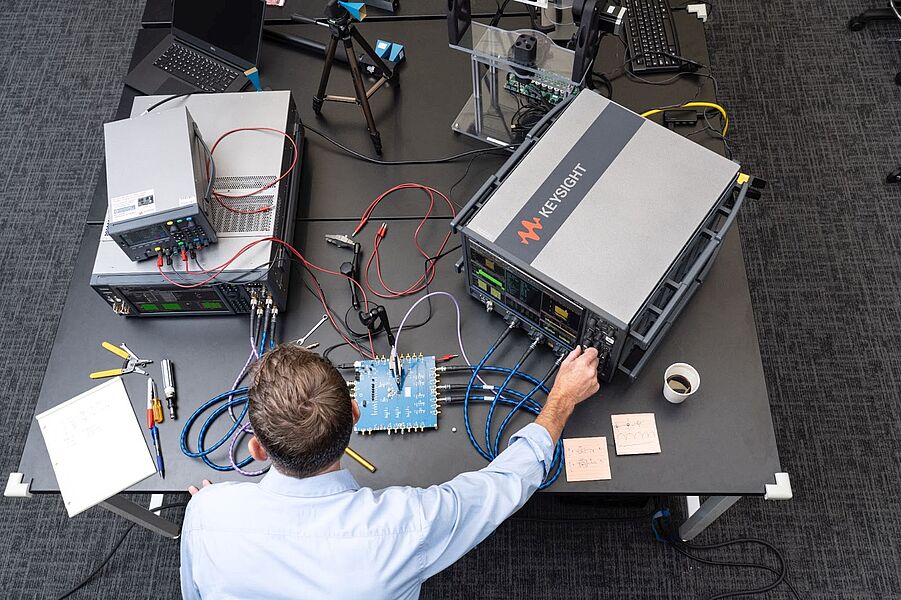
Step 2: Setting Up Test Equipment
Configure spectrum analyzers, EMI receivers, antennas, and LISNs. Ensure calibration is current and cables are low-loss.
Tip: Learn how a spectrum analyzer works to optimize setup efficiency.
Expected outcome: A test bench that produces accurate, reproducible results.
Take-away: Correct setup is half the battle in EMI testing.
Step 3: Conducted Emissions Testing
Measure interference conducted on power and signal lines through LISNs.
Checklist:
- Connect LISN to mains input
- Monitor power line noise with EMI receiver
- Record data over defined frequency ranges
Tip: Use shielded cables and proper grounding to reduce false readings.
Expected outcome: A frequency profile of conducted emissions versus limits.
Take-away: Conducted tests often reveal design flaws in filters or grounding schemes.
Step 4: Radiated Emissions Testing
Measure unwanted energy radiated into the environment. Place the device in an anechoic chamber or open-area test site.
Checklist:
- Position antennas at defined distances (3m or 10m)
- Rotate device to capture maximum emissions
- Record peak, average, and quasi-peak values
Tip: Avoid reflections by ensuring test area is clear of conductive objects.
Expected outcome: Radiated emission levels across the spectrum.
Take-away: Radiated testing ensures your product doesn’t interfere with nearby devices.
Step 5: Immunity Testing
Evaluate resilience against external disturbances: ESD, EFT, surge, radiated, and conducted immunity per IEC 61000-4 standards.
Checklist:
- Apply defined disturbances under normal operation
- Monitor for malfunctions, resets, or data loss
Tip: Document both failures and recovery times, both matter for compliance.
Expected outcome: Verified immunity performance according to regulatory limits.
Take-away: Immunity testing protects both your product and your customer.
Step 6: Root Cause Analysis and Troubleshooting
When limits are exceeded, investigate sources with near-field probes, oscilloscopes, or time-domain analysis.
Tip: Test early prototypes to catch EMI problems before production.
Expected outcome: Pinpointed EMI sources and actionable fixes.
Take-away: Troubleshooting early saves the most money and time.
Step 7: Documentation and Certification Reporting
Prepare reports with measured data, pass/fail verdicts, and corrective actions taken. These documents form the basis of compliance certification.
Tip: Keep templates ready, structured reporting reduces administrative overhead.
Expected outcome: A compliance-ready test report package.
Take-away: Good documentation is your proof of compliance and protection against liability.
Troubleshooting Common EMI Issues
Even with careful preparation, EMI testing often uncovers challenges that require immediate diagnosis and correction. Recognizing these issues early and applying targeted solutions helps avoid wasted lab time and costly redesigns.
Common problems engineers encounter during EMI testing include:
- Excessive conducted emissions on power lines.
- Radiated emissions peaking above regulatory limits.
- Failures during electrostatic discharge (ESD) or surge immunity tests.
- Intermittent failures that only occur in certain operating modes.
- Inconsistent results between test runs.
Practical mitigation techniques:
- Add or redesign filtering components (ferrites, common-mode chokes, capacitors) to reduce conducted noise.
- Improve PCB layout with better grounding, shorter return paths, and minimized loop areas.
- Reposition cables and harnesses to lower radiation coupling.
- Use shielding or enclosures to block radiated emissions.
- Verify test equipment calibration and setup consistency to rule out false failures.
When to consult experts:
If repeated failures occur despite design changes, or if results vary significantly between labs, it’s time to involve professional EMI consultants or use accredited testing services. External labs provide specialized equipment, controlled environments, and compliance expertise that internal setups may lack.
Typical mistakes to avoid:
- Treating EMI troubleshooting as a final step rather than an ongoing process.
- Over-relying on a single test method without cross-checking with other measurements.
- Misinterpreting results due to poor documentation or incorrect instrument settings.
- Skipping pre-compliance testing, which could have identified issues earlier.
Advanced Tips and Variations
Once the fundamentals are in place, EMI testing can be refined and adapted to address more complex scenarios. Emerging standards, specialized products, and challenging environments often demand advanced approaches that go beyond basic compliance.
- Expert advice for complex scenarios: For high-frequency designs, time-domain and real-time spectrum analysis can uncover transient events that traditional methods miss. Automotive and aerospace applications may require compliance with sector-specific standards such as ISO 11452 or DO-160, which demand tailored test setups and extended test conditions.
- Alternative testing methods and pre-compliance tools: Portable spectrum analyzers, compact chambers, and near-field probes enable engineers to perform early, cost-effective checks during prototyping. These tools reduce the risk of late-stage failures and give teams a practical way to refine designs before investing in full compliance testing.
- Customizing EMI tests by product category: Consumer electronics often focus on radiated emissions in tight regulatory bands, while medical devices may emphasize immunity to ensure patient safety. Power electronics demand close monitoring of conducted emissions and harmonics, while connected devices face the added complexity of co-existence testing alongside wireless technologies.
Real-World Applications and Case Studies
EMI testing is a practical necessity across industries where reliability, safety, and compliance determine success. Different sectors face unique interference challenges, but the lessons learned are widely applicable.
Automotive
Modern vehicles integrate electric drivetrains, advanced driver assistance systems, and infotainment units. These create dense electronic environments where EMI can disrupt safety-critical systems like braking or steering. Automotive OEMs rely on standards such as CISPR 25 and ISO 11452, using pre-compliance testing early in design to minimize costly redesigns late in development.
Aerospace
In aircraft, electronic systems must operate reliably under extreme conditions. EMI testing verifies that navigation, communication, and avionics systems maintain performance despite external electromagnetic disturbances. Compliance with standards like DO-160 is essential, but engineers often face the added challenge of designing lightweight shielding that does not compromise fuel efficiency.
Consumer Electronics
Smartphones, wearables, and home devices compete for bandwidth in crowded RF environments. EMI testing ensures these products meet FCC or CE requirements while maintaining performance in the hands of consumers.
Here, the main challenge is balancing small form-factor designs with effective EMI control, often requiring creative PCB layout and filtering strategies.
Across these industries, engineers often struggle with applying EMI knowledge practically. Test results may not directly translate into clear design fixes, and interpreting failures requires both experience and the right tools. Case studies consistently show that early testing, simulation, and expert consultation are the most effective ways to bridge the gap between lab data and design improvements.
Additional Resources
Mastering EMI testing requires both the right tools and continuous learning. Beyond the steps in this guide, engineers benefit from reference materials, professional communities, and practical alternatives that keep projects on track.
- Recommended tools and materials: Spectrum analyzers, EMI receivers, line impedance stabilization networks (LISNs), and near-field probes form the backbone of any EMI test setup. Portable pre-compliance tools can serve as cost-effective alternatives when full test chambers aren’t available, helping teams identify issues early.
- Learning resources: Formal courses on electromagnetic compatibility, hands-on workshops, and technical manuals for standards such as CISPR and IEC 61000 provide structured ways to deepen knowledge. Many manufacturers also publish application notes and white papers that illustrate how to apply EMI control techniques in real designs.
- Communities and forums: Collaboration with peers often accelerates problem solving. The EMI/EMC Professional Forums on Edaboard host active discussions where engineers share troubleshooting methods, test results, and design strategies. Engaging in these communities can provide valuable insights not always found in manuals.
By combining reliable test instruments with ongoing learning and peer exchange, engineers can strengthen both their technical expertise and their ability to deliver compliant, reliable products.
Quick Reference
EMI Test Steps at a Glance
| Step | Key tip |
|---|---|
| Planning & preparation | Define standards early to avoid redesigns |
| Equipment setup | Verify calibration and grounding |
| Conducted emissions testing | Use LISNs and shielded cables |
| Radiated emissions testing | Position antennas carefully in chamber |
| Immunity testing | Document both failures and recovery time |
| Troubleshooting | Probe near fields to locate root causes |
| Reporting | Standardize templates for efficiency |
Glossary
- EMI: Unwanted disturbance affecting electronics.
- EMC: Ability to function without causing/experiencing EMI.
- Emissions: Signals your device radiates or conducts.
- Immunity: Device resilience against external interference.
- LISN (Line Impedance Stabilization Network): Device that isolates power lines and measures conducted noise.
- Shielding: Physical barriers (metal enclosures, gaskets) to block or contain EMI.
- Quasi-peak detector: Measurement mode used in EMI receivers to match regulatory test limits.
Conclusion
EMI testing is a cornerstone of reliable product design. By understanding the fundamentals, following a structured workflow, and applying effective troubleshooting, engineers can reduce delays, lower costs, and deliver products that meet both performance and regulatory demands.
The next step is to apply these best practices consistently. Continue learning through standards and resources, invest in the right test equipment, and partner with experts when challenges go beyond in-house capabilities. A strong EMI strategy builds design confidence, accelerates time-to-market, and safeguards your reputation.
Looking to enhance your lab with precision instruments without breaking the budget? Keysight’s Premium Used Equipment includes EMI receivers, spectrum analyzers, oscilloscopes and more—professional-grade tools designed for accurate EMI and EMC testing. Each item is thoroughly inspected and pre-calibrated for reliability, ensuring accuracy in your testing and diagnostics.
Whenever You’re Ready, Here Are
5 Ways We Can Help You
Call tech support US: +1 800 829-4444
Press #, then 2. Hours: 7am – 5pm MT, Mon– Fri
Contact our sales support team
Create an account to get price alerts and access to exclusive waitlists
Talk to your account manager about your specific needs.
Frequently Asked Questions
What does EMI testing mean?
EMI testing measures how much electromagnetic interference a device produces and how well it resists external interference. It ensures products meet performance and regulatory requirements.
What is the difference between EMI and EMC testing?
EMI focuses on the interference itself, while EMC evaluates a product’s overall ability to operate correctly in its environment without causing or experiencing interference.
How can I effectively perform EMI pre-compliance testing in-house?
Use spectrum analyzers, EMI receivers, LISNs, and near-field probes in a controlled setup. Pre-compliance checks identify major issues early, reducing risk of failure at accredited labs.
What are the common EMI test methods?
The main methods are conducted emissions, radiated emissions, and immunity testing (ESD, EFT, surge, radiated and conducted susceptibility).
How do I choose the right EMI test equipment within a limited budget?
Prioritize tools that provide accurate, repeatable results, such as EMI receivers and calibrated spectrum analyzers. Certified pre-owned equipment can be a cost-effective option.
What are the most common causes of radiated emissions failures?
Poor PCB layout, long unshielded cables, inadequate grounding, and insufficient shielding often lead to radiated failures.
How can simulation tools complement physical EMI testing workflows?
Simulation models potential EMI issues before prototypes are built, helping engineers refine designs and reduce costly test iterations.
When is it necessary to involve an external EMI testing lab?
When full compliance reports are required for certification or when in-house tools can’t replicate regulatory test conditions.
What are the typical EMI testing standards?
CISPR, IEC 61000, FCC Part 15, DO-160 (aerospace), and MIL-STD-461 (defense) are among the most common standards.
How long does EMI testing usually take?
A full compliance campaign can take several days, depending on device complexity. Pre-compliance checks are shorter, often completed in hours.